It is not everyday that you meet a well-designed forward-thinking Android smartphone that is at the entry level. you are probably getting the best deal with the Tecno Boom J7 than you can get elsewhere. As far as Android devices go that is.
Here are the technical specifications of the Tecno Boom J7:
Display: 5 inch HD (720p)
Memory: 16 GB internal storage; 1 GB RAM
Camera: 8 MP back; 2 MP front
Processor: Quad-core MediaTek MT6582 clocked at 1.3 GHz
Operating system: Android 4.4.2 KitKat
Battery: 2020mAh
Connectivity: Bluetooth, Wi-Fi
Network: 2G, 3G
Other: Dual-SIM
While music is what the Tecno Boom J7 is meant to be all about, we are sure anyone considering buying this device will be interested in knowing how it fairs in other areas as well like the camera or the battery. If music is all you want, you can see what I experienced in my three weeks of testing the device, else kindly read on.
Design
I’ve followed Tecno from the sidelines and when I look at the Boom J7 and remember the days when they introduced another interesting affordable smartphone (the N3 and the N3S), I can see progress. While I think they can do a lot better with their offerings at the flagship level, they are definitely killing it at the entry-level. The Tecno Boom J7’s design refines everything there is to know and like or hate about Tecno as a brand. It’s well done. From the red accents of the speaker grille and the camera at the back to the slim sideways bezels on the front, the device is a beauty.
I also applaud the decision to omit the Tecno logo from the front of the device. It makes it positively hideous and it stands out.
I am not a big fan of soft buttons like my peers seem to be but Tecno nailed it on the Boom J7 at least with the home button. It comes to life and blinks continuously when you get notifications. I’d actually pick such over blinking LED notifications at the top any day. Bring such a feature with the ability to change colours depending on notification type and you have a winner. Probably on a high end model as this is too much to ask for on a budget device.
Display
It’s decent. That’s the most I can say about it. It may not be as popping as what you find on other HD displays but it’s much better than the Infinix Hot Note’s display by comparison. The 5 inch display is also brighter than the display you find on the Wiko Getway which is even pricier but packing almost similar specifications. It is half-decent outdoors even at full brightness.
Camera
Both cameras on the Tecno Boom J7 are horrible. I am sorry to say this but I struggled to get good shots all the time. I am not a professional photographer but I can easily tell which photo I want to go straight to my Instagram feed and which one will never see the light of day beyond an internal trash folder. Taking selfies in low light is a pain in all the wrong places you can imagine. Using the bigger 8 megapixel sensor at the back of the phone doesn’t change things. Yes it won’t be bad all the time but you can actually count the number of times it produces really incredible shots. You’ll also need to be in brightly lit surroundings. You really have to struggle to get a better shot. Good luck doing that if you have shaky hands. Tinkering with the settings won’t get you much.
Battery
Like I noted during the preview, I was able to get very impressive battery life when I stayed away from cellular data but then again that is not always the case. I managed to get at least 8 hour battery life when using the phone mildly on Wi-Fi. 6 hours was the standard when cellular data was on with the occassional Whatsapp, email and the like. Over three and a half hours of screen on time are guaranteed if you just stick to using your office or home hotspot. Good luck doing over 1 hour and 40 minutes when you’re using 3.75G.
The Tecno M3 is another fantastic Tecno Mobile entry-level AndroidSmartphone. The handset is one of the most popular budget handsets in the market and is available at Most retail centers.
The Tecno L7 is yet another jaw-dropping device from Tecno. Packed With 2GB RAM and running on Android 4.4 KitKat, this device is sure to shame Tecno’s critics.
Design
The TecnoL7 is a Smartphone impressively made with clearly defined uniqueness. It comes in various colors for you to choose from like white, black, yellow, grey andpink and covered nicelywith plastic for your convenience, in dimensions of 141.5 x 70.74 x 8.9mm.
The keyboard istouchscreen, and the phone allows dual mini SIM. It also has a good functional case that allows easy access to its battery and SIM section behind it.
Display
The phone displays with fascinating brightness on a 5.0 inch flat faced screen with IPS type capacitive touch screen, with a resolution of 720 x 1280 pixels, and density at 294 pixels per inch (PPI).This phone has a good display, you can see everything clearly without straining your eyes.
OS, processor and memory
The Tecno L7 comes with Android 4.4 KitKat operating system and a 1.3GHz quad-core Cortex- A7 CPU.A MediaTek chipset, Mali-400-MP2 GPU specification. It accommodates your various applications and runs them smoothly without hassles.
Enjoy Android games and various popular applications like Skype, Viber, Instagram, Twitter and Google talk to mention few. Download as much as you like, watch movies, play music and play games without worries.
Camera
Pictures just got better for you with this phone’s primary camera that takes pictures at 13MEGAPIXELS and up to 4128 x 3096 pixels. The camera has a LED flashlight just beside the rear camera and it offers HDR, face and smile detection.
The secondary camera allows you to take Skype calls, allows you have video conferencing and most importantly you can take lovely selfies. Video quality comes with it at 1080p@30fps so that you can record fun moments happily.
Battery
The Tecno L7 has a strong battery made of Li-Ion with a high capacity of 3050mAh.It supports talk time up to 11 hours, music play time up to 30 minutes and Stand By time up to 500 hours. I can assure you this battery has got your back never to let you down.
Product specifications and features
Display: 5.0 inches,720 x 1280 pixels, 294 pixels per inch (PPI), IPS capacitive touch screen with 16,000,000 colors
OS: Android 4.4 KitKat
Processor: 1.3GHz quad-core Cortex-A7 CPU MediaTek MT6582 chipset, Mali-400MP2 GPU and 2GB RAM.
Memory: Internal memory 16GB, Card slot MicroSD up to 32GB
Camera : Primary 13MP, up to 4128 x 3096 pixels pictures, Secondary 5MP ,up to 2592 x 1944 pixel pictures, VIDEO 1080@30fps, HDR, face and smile detection with LED flash
Audio: Vibration, MP3 ringtones, Loudspeaker with Audio port 3.5mm jack
Battery:Capacity 3050mAh Li-Ion battery with stand by time up to 500 hours, Talk time up to 11 hours, 30 minutes Music play.
Connectivity: 2G GPRS- up to 85.6 kpbs; EDGE Bluetooth Version 3.0 ,3G up to 21 mbps downlink; up to 5.76 mbps uplink
Other features you would find include USB MicroUSB v2. 0, GPS A-GPS,SNS integration, FM radio,MP4/MPEG4/H.263/H.264 player and MP3/WAV/eAAc+/AC3/FLAC player
Tecno has released the D9 with Android 4.2 and a huge 6 inches display with a resolution of 540*960 which is quite small for such a big screen and will result in a pixel per inch(ppi) ratio that is not good for the user experience. The Tecno D9 also comes with an 8MP back camera for taking HD videos and pictures and a 5MP front camera for video conferencing, skyping and what have you. It is a dual SIM phone with 3G on one sim and Edge/GPRS on the other sim.
Tecno D9 Features And Full Specs
Platform
Operating system : Android 4.2 OS (Jelly Bean) Network : GSM/DCS/WCDMA Band : GSM
Basic Parameter
CPU frequency : 1.2GHz Quad-core CPU model : MTK6582M GPU model : Embedded(mostly mali 400 mp2) Battery Capacity : 2450mAh Talk time : – Standby time : –
Data
GPRS : Yes EDGE : Yes 3G : Yes
Size
Dimension : 165*84.2*10.4mm
Memory
ROM : 4 GB RAM : 1 GB MicroSD : Expandable microSD; up to 32G
Camera
Front-facing camera : 5.0 MP AF Rear-facing camera : 8.0 MP AF Flash Light : front and rear flash light Video recording : Yes Video calling : Yes Image size : – Unique features : –
Display
Size : 6.0″ Material : IPS Type : qHD Resolution : 540*960
After a fairly long break with their large-screen Android devices, Tecno hit the market again with this “next big thing”.
It is no more news that Tecno can be labelled and is now a very popular brand in the smartphone gadget market especially in Nigeria because it perfectly fits the budget of low to average or mid income earners. Tecno has so far humbled the Android market (Samsung, HTC etc) to a great extent.
Now with a moderate price you can get an Android powered phone with amazing features. And following the meteoric success of the Phantom A, the brand has released its successor, the Phantom A2.
The Tecno Phantom A2 Phone is also known as Tecno Phantom AII, Tecno Phantom A2, Tecno F8 Phantom AII and Tecno F8 Phantom AII.
According to a release by Tecno:
Innovative thinking brings brilliant ideas together which contribute to making A2 possible. Life will be much more interesting, simpler, and more colorful with A2. Faster and smarter ways to get connected with the world outside and the people you beloved. A2 is leading the road of next-generation smartphone devices.
Now, let’s look at the features of the new Tecno Phantom A2 (F8), especially those aspects in which it trumps the Phantom A1 (F7).
Display: Tecno Phantom A2 has a massive 5.7-inch display. So, this phone is made to impress those who are sticklers for large display.
Networks: Aside running on 2G and 3G networks, the new Tecno F8 takes one more step ahead by running on the 3.75G network. This guarantees even faster internet connection and download speed.
Os and Processor: Tecno F8 runs on the latest version of Jelly Bean (version 4.2.2) and packs a stronger and faster 1.2 GHz quad core processor.
Camera: Tecno A2 comes equipped with a 13MP rear camera and 8MP front camera. Yes, you read right. 13MP and 8MP! The front camera is definitely a record breaker. None of the high-end smart phones have a front camera with a resolution this high.
Battery: Tecno improved on the F8′s battery. The new smartphone packs a 2630 mAh Li-ion battery.
FLASHING BACK STOCK ROM
Ok, SO every once in a while you are forced to have your phone flashed at the local dealership or at a Tecno outpost. This can become an expensive venture for those who value availability of their smartphone. But what you didn't know is that flashing, which is like a magical solver for almost all android problems, is quite an easy undertaking. Therefore here is a dedicated tutorial from some well informed persons on how to go about flashing your stock ROM back. I have even made it a whole lot easier by consolidating all the necessary items into this post. Now all you need to flash your ROM is a computer, Your phone's drivers, the stock Rom itself, and well, Your phone. Happy Flashing.
Instaling A ROM Or App From Zip File To Android Device From Recovery
We have been covering a lot of Android ROMs and applications here
at AddictiveTips and the installation procedure of most of those ROMs is
the same. That’s why we decided to write a dedicated guide on how to
flash any ROM or app from a zip file to your Android device using
recovery. In this guide, we will be covering the entire flashing
procedure, along with links to resources for rooting your device and
making and restoring backups. Please note that the terms ‘installing’ and ‘flashing’ can be used interchangeably here and will mean the same thing. Official
ROM updates from device manufacturers or carriers are released in
conveniently packaged installation files that you can run on your
computer while your Android device is connected to it, and they
automatically take care of updating your phone’s system. Similarly, most
applications are available directly in the Android Market for easy
installation, or come packaged as convenient ‘.apk’ files that you can
just run on your Android phone to install. The case is not the same with
most custom ROMs and several custom applications, which come in .zip
files rather than PC installers or .apk files. The idea of installing a customized operating system to their
smartphone can be quite intimidating for inexperienced users. Though
once they get used to it, some of them end up trying out different ROMs
for their devices several times a day. While we don’t exactly recommend
that you flash every new ROM that is made available for your Android
phone, we are here to help you get over the fear of flashing a ROM that
enhances the capabilities of your device so that you can use it to its
fullest potential. Here is a quick look at what we will be covering in this guide. Feel
free to skip to the real deal if you already meet the prerequisites. There are certain steps that you might not require, and we shall be mentioning them in each section. Before We Begin: Battery Check
Before you proceed with any of the following steps, make sure your
phone’s battery level is not too low. It is recommended to have it at
50% or more. Do NOT take this lightly. If your phone’s battery runs out
while you are attempting to flash a custom ROM, there is a significant
chance of your phone getting bricked and becoming unusable PERMANENTLY. Before We Begin: Unlocking the Bootloader (Stock Android Devices Only) Note: This step applies only to Android devices with
stock version of Android installed. At the moment, Google Nexus One and
Nexus S are the only two such devices available. You may skip this step
if you are using any other Android device. Users of stock Android devices such as the Google Nexus One or Nexus S
also need to unlock its bootloader before they can proceed. To do this,
simply follow this guide on what is the bootloader and how to unlock it for stock Android phones. Once you have done this, you may proceed to the next step.
Before We Begin: Rooting
Note: You may skip this step if your device is already rooted, or if you already know how to root it. Before you can install a custom ROM to your device, your phone needs
to be rooted. Rooting is basically administrator or root level access
required to perform administrative tasks on your Android device. To root
your phone, you can refer to this detailed guide on how to root an Android device. Once you are done with the rooting process, you may proceed to the next step. Before We Proceed: Installing A Custom Recovery
Note: You may skip this step if you already have a custom recovery installed on your device. Rooting grants you the necessary access level to execute
administrative tasks on your Android device but it is the recovery that
provides the tools necessary to actually perform those tasks. While
every Android device ships with a recovery, the stock recovery is quite
limited in what it lets you do, and you need a custom recovery image to
perform advanced operations on your device. We have covered this process
in detail in this guide on how to install a custom recovery to a rooted Android device that you can follow. Once you have a custom recovery installed on your phone, you will be ready to proceed to the next step. The Real Deal: Installing a Custom ROM to your Phone
Now that you have a custom recovery installed on your phone, you can
perform all sorts of wonderful advanced operations on your device and
this includes the ability to flash a ROM or application from a zip file.
The procedure is pretty standard for most ROMs, though there are
certain ROMs which require additional steps for their installation.
Since those steps differ from ROM to ROM, we shall be mentioning those
in our reviews and guides on those ROMs, and feature only the standard
instructions here. There are two paths to follow from here. You can either use ROM
Manager to specify the actions you need performed in Recovery, and it
will take care of everything for you, or you may manually reboot your
phone into recovery to perform the steps yourself. We will cover both
methods here. If you used the ROM Manager method to flash ClockworkMod
recovery, you already have it installed. If you used some other method
to flash the recovery, or flashed a recovery other than ClockworkMod,
you might not have ROM Manager installed but you can get it for free by
searching for it at the Android Market.
Using ROM Manager
Download the ROM from the link given in the article featuring that ROM. It should be a zip file.
Connect your phone to your computer via USB and mount its storage card.
Copy the downloaded ROM to the storage card. It is a good idea to place it on the root of the storage card.
Launch ROM Manager on your phone.
Tap ‘Install ROM from SD Card’
Scroll down and tap on the zip file for the ROM that you copied to
your sd card in step 3. You will be presented with a dialog box titled
‘Install Queue’.
In case you want to install another zip file immediately after this
ROM, tap ‘Add zip’ and select the next zip file that you want flashed.
Skip this step if the ROM is all you want to flash for now.
Tap ‘OK’. You will now see a dialog titled ‘ROM Pre-Installation’,
with options to backup the existing ROM and wipe data and cache.
ALWAYS check ‘Backup Existing ROM’ UNLESS you can afford to lose everything that’s on your phone at the moment.
ALWAYS check ‘Wipe Data and Cache’, UNLESS the ROM you are
attempting to flash is an updated version of the same ROM that you are
currently using, and is compatible with the previous installation’s
data. It is usually mentioned with the update whether you can install it
over a previous version without wiping its data or not.
Tap ‘OK’ and confirm any prompt that you get. Your device will now
reboot into recovery and the selected ROM will be automatically
installed. The new ROM will be booted once the installation is complete,
though you might be prompted to confirm the reboot.
Manually
Download the ROM from the link given in the article featuring that ROM. It should be a zip file.
Connect your phone to your computer via USB and mount its storage card.
Copy the downloaded ROM to the root of the storage card.
Power your phone off and reboot it into recovery. This will involve
using a combination of your device’s hardware keys. In case you don’t
know how to do this, you can follow this guide on how to boot your phone into recovery.
Once in recovery, you can navigate its menu using the volume up and
volume down hardware keys or your phone’s trackball / optical track pad
if it comes equipped with one.
Use the ‘backup and restore’ feature of recovery to backup your
existing ROM installation, software and data. This step is known as
performing a nandroid backup. For more information on how to make and
restore backups, see this guide on how to perform and restore a nandroid backup.
ALWAYS perform a backup before flashing a custom ROM, UNLESS you can
afford to lose everything that’s on your phone at the moment.Note: ALWAYS choose to perform the following steps 6, 7
and 8 UNLESS the ROM you are attempting to flash is an updated version
of the same ROM that you are currently using, and is compatible with the
current installation’s data. It is usually mentioned with the update
whether you can install it over a previous version without wiping its
data or not.
Get back to the main recovery menu and use the option ‘wipe
data/factory reset’. You will be prompted to confirm this action. Select
“Yes – Delete all user data”.
From the main recovery menu, select ‘wipe cache partition’. You will
be prompted to confirm this action. Select ‘Yes – Wipe Cache’.
From the main recovery menu, enter the ‘advanced’ menu. From this
menu, select ‘Wipe Dalvik Cache’. You will be prompted to confirm this
action. Select ‘Yes – Wipe Dalvik Cache’.
Go back to the main recovery menu by pressing the back button and select the ‘Install zip from SD card’ option.
Select ‘choose zip from sdcard’ to get a list of the files and
folders on your SD card. Scroll to the ROM’s file that you copied there
in step 3, and select it. You will be prompted to confirm this action.
Select ‘Yes – Install file_name.zip’ where file_name.zip is the name of
the zip file that you are trying to install.
Wait patiently while the ROM is flashed to your phone via recovery.
Once the installation is complete, head back to the main recovery
menu if you aren’t there, and select ‘reboot system now’. Your phone
will now boot into the newly installed ROM.
The Real Deal: Installing an App From a Zip File to your Phone While most apps for Android devices are available at the app store
for direct download and installation or as .apk files for direct
installation, there are certain apps which are only available as zip
files installable from recovery. Their installation procedure is the
same as installing a custom ROM that we just featured above. However,
there are a few minute differences.
When installing an app from a zip file, you do NOT need to perform
the ‘wipe data/factory reset’ step so NEVER do that unless you know what
you are doing, have a complete backup and want to start using your ROM
as a fresh installation with the new app added.
You might or might not need to wipe the cache and the dalvik cache
for installing apps from zip file. This varies from app to app and the
developers of such apps as well as many reviewers including us mention
when featuring an app whether it requires a cache and dalvik cache wipe
or not. However, it never hurts to wipe these caches anyway, and it does
not effect the data on your device or its storage card.
There you go, this concludes our guide on how to flash a ROM or app
from a zip file to your Android device using a custom recovery. To try
out the skills that you just learned, search our site for custom ROMs
for your phone and start flashing, always remembering to take backups
first!
Android is great, but sometimes, the version you get with your phone—whether its vanilla Android or something like Samsung's TouchWiz—leaves a bit to be desired. Here's how to install a new version of Android (or ROM) on your device for an even better Android experience.
What's a ROM?
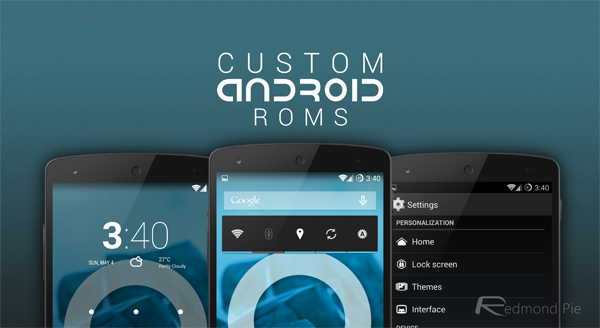
One of the best things about the openness of the Android platform is that if you're unhappy with the stock OS, you can install one of many modified versions of Android (called ROMs) on your device. A new ROM can bring you the latest version of Android before your manufacturer does, or it can replace your manufacturer-modded version of Android with a clean, stock version. Or, it can take your existing version and just beef it up with awesome new features—it's up to you.
If you're familiar with Linux, it's sort of similar to installing a different Linux distribution. Each version of the OS has a specific goal in mind, and as such differs quite a bit from the others. Which one you choose is dependent on your priorities and how you use the device. You'll need to unlock your bootloader and flash a custom recovery (more info on that here), but once you get the hang of it, it's not too difficult.
There are a lot of different ROMs out there, and if you're looking for a place to start, check out our list of the five most popular. You can also check out this amazing chart which compares a ton of ROMs feature-by-feature, which is a great way to find the right one for you. Even if you have a Nexus phone with pure stock Android, ROMs are a great way to add new features and conveniences to Android.
Step One: Unlock Your Bootloader and Flash a Custom Recovery
First, let's clear up some confusion: Contrary to popular belief, you do not actually need to root your phone to flash a ROM—you just need to unlock your bootloader and flash a custom recovery. However, this process usually goes hand-in-hand with rooting—and most custom ROMs come with root access—so what you think of as "rooting your phone" is probably what you're going to have to do first.
Unfortunately, we can't go through this step in detail here, because it's different for every phone! So, I highly recommend checking out our everything root guide to learn a bit more about what's involved, what all the different terms mean, and what to watch out for. Then, search around sites like XDA Developers for instructions on how to unlock the bootloader of your specific phone, which recovery you should use (usually TWRP or ClockworkMod), and how to flash it.
I also recommend rooting your phone during step one, since it'll make the backup process in step two easier—and save you some hassle along the way. A lot of methods and one-click apps will root your phone anyways, so it might be included in the process. Again, this can vary from phone to phone. (If the instructions require you to flash SuperSU.zip, you can refer to step three of this guide for info on how to do that—ironically, it's just like flashing a ROM).
NOTE: Unlocking your bootloader will most likely wipe your phone, and without root access, you won't be able to back up very much. So, save anything you want to keep on your computer—you will have to set up your phone from scratch just this once before continuing.
When you're done, return here and continue to step two for the rest of the ROMming process.
Step Two: Make a Backup of Your System, Apps, and Data
Now that you've got a custom recovery on your phone, the first thing you should do—before you ever make a big change to your system—is back it up. First, we'll make a Nandroid backup, which is basically a image of your current system. That way, if something goes wrong, you can restore your phone to exactly the way it was before you started tweaking. This will save you a lot of hassle if something goes wonky (which, let's be honest, can happen often). To do this:
Reboot your phone and enter recovery mode. This is a bit different on every phone, but usually involves some permutation of pressing the power and volume buttons at the same time.
Head to the "Backup" or "Nandroid" section of your recovery mode. The default settings should be fine. If given the option, give your backup a name that helps you remember what it is (like "Pre-CyanogenMod Backup 01-17-14"). Confirm your backup and let it run.
Wait for the backup to finish. This may take awhile.
I also recommend making a second type of backup: your apps and settings. If you just unlocked your bootloader and wiped your phone, you can skip this step, but any time you flash a ROM in the future, you'll want to back up your apps first, since you may have to wipe your phone before you flash. With a backup, you can easily restore those apps and data after flashing, making the process a lot simpler. I recommend using Titanium Backup.
This is different from a Nandroid backup because it just backs up the apps themselves, which you can then restore on any ROM you want. Nandroid backups take your entire system as it is, ROM included.
Note that you'll need to be rooted to use Titanium Backup (which is why I recommend you root in step one). To perform a backup in Titanium:
Open Titanium Backup and grant it root permissions if it asks for them. If it experiences any problems with root, it'll tell you right now.
Tap the "Batch" button in the upper right-hand corner (the one that looks like a little checkbox). Scroll down to the "Backup" section and find "Backup All User Apps." Tap the "Run" button. This will back up any apps you've downloaded from the Play Store, and their data. (You can try backing up your system data as well, but I find this usually doesn't work very well).
Wait for it to finish. If you like, you can also sync these to Dropbox as described here, but you don't have to for this process.
This may seem like a lot of unnecessary backups, but trust me: it's going to save you a lot of time in the long run. Now if something goes wrong, you have a nandroid backup to fall back on and don't have to start from scratch. And, when your ROM flashes successfully, you don't have to start re-downloading and setting up all your apps yourself because you can restore them with Titanium.
Step Three: Download and Flash the ROM of Your Choice
Now comes the fun part: flashing your ROM. First, obviously, you need to find the ROM you want. Again, this chart is a good place to start, You may also want to poke around sites like the XDA Developers forums to see what's available for your particular phone.
When you've found a ROM you want to try, download it and save it to your phone. It should come in the form of a fairly large ZIP file, so you'll probably want to be on Wi-Fi to download it. You can either download it directly from your phone, or download it on your computer and transfer it over via USB.
To flash your ROM:
Reboot your phone into Recovery mode, just like we did back when we made our Nandroid backup.
Head to the "Install" or "Install ZIP from SD Card" section of your recovery.
Navigate to the ZIP file you downloaded earlier, and select it from the list to flash it.
Wait for the process to complete; it may take a few minutes.
Depending on your situation (see below), you may also need to wipe your data and/or cache. In TWRP, you'll find this under the "Wipe" section, and in ClockworkMod, you'll need to either choose the "Wipe Data/Factory Reset" option or the "Wipe Cache Partition" option. When you're done, you're free to reboot into your new ROM.
So, when should you wipe your data and cache? Here are a few general guidelines:
If you're flashing a ROM different than the one you're currently running, you should wipe data and cache. Essentially, this performs a factory reset on your phone, and you will lose all your data.
If you're flashing a new version of a ROM you're already running, we recommend wiping your data and cache—but you should be able to get away with just wiping the cache, meaning you get to keep all your apps and settings.
Remember, if you backed everything up with Titanium, then doing a factory reset isn't all that bad, since you can just restore most of it. Keep in mind that even if you're just upgrading your existing ROM, factory resets can be helpful. If you only wipe your cache, note that a few apps may run into issues, but reinstalling them or wiping that app's data usually fixes the problem.
When you reboot, you should be in your shiny new ROM, ready to play! But what? There's no Play Store? Read on for the last step of the process...
Step Four: Download and Flash Google Apps
Because Google's apps are not open source, custom ROMs can't bundle Google's apps—like Gmail, Hangouts, or the Play Store—with their ROMs. That means you'll need to download and flash them separately. Luckily, this is pretty easy to do: just head to this page on RootzWiki to find out which ZIP file you need, download it to your phone, and flash it just like you did the ROM in step three.Gapps Manager is also a great app that'll help you find the right package if you're stuck, and you can download the APK from XDA Developers.
Once you've flashed the latest Google Apps package, you should be all set! You'll have a new ROM with tons of settings to play with, the Play Store to download new apps, and—if you made a backup with Titanium—you can now head into Titanium Backup and restore all your apps and their settings. Enjoy!





 Posts
Posts