Pages

Thursday, December 3, 2015

TECNO CAMON C8 REVIEW PLUS HOW TO FLASH STOCK ROM FREE


Tecno Camon C8


Tecno Camon C8
There is nothing that sets the blood rushing faster than going out shopping and striking a pocket- friendly deal for a pleasant product. Tecno Camon C8 targets such shoppers with an alluring proposition priced at just about Ksh. 13, 000.
The Camon C8 is a phablet with a screen size of 5.5 inches. This IPS touchscreen has a resolution of 1280 x 720 pixels thereby delivering a good, high definition quality. The highlight here (considering the price) is the use of a metallic frame and glass for the display which gives it a sense of durability.
Tecno Camon C8 has dual- SIM slots so you can carry around two SIMs in your phone instead of having two phones in the pocket. I must admit that the concept of a dual-SIM smartphone grows on you over time as you appreciate the convenience of it. Especially when you have two categories of people for each line, say a category for business contacts and another for family, friends and distant acquaintances.
The dimensions used for the body are typical of phablets. It is a large device with a substantial thickness. You will definitely get a great entertainment experience given the size of the display, but the phablet has a bulkiness to it that will make your pocket to bulge, and we are not even thinking tight jeans!
Perhaps the highlight of this product is its photography credentials which can quickly make you forget that this is primarily a phone and not a compact camera. The back camera is the most impressive shooter with a lens of 13 megapixels which promises great stills and high definition movies. This coupled by dual LED flash and autofocus make it a highly desirable companion when you want to capture treasurable moments such as parties, anniversaries or random subjects of interest. However, not intending to throw a wet blanket here, there is so much you can demand from a budget smartphone. But even before jumping into any conclusions about the possibilities, perhaps there is much to be gained given that the 5 megapixels secondary camera comes with its own LED flash making it an instant pick for a selfie- taker. 
Tecno Camon C8 runs Android 5.0 Lollipop that is now very popular with third party app developers. The open nature of the android platform means you get a wide variety of apps to choose from on Google Play store.
Among the hardware concealed beneath the outer interface of the phone is a Mediatek processor that has four cores with clocking speeds of up to 1.3 GHz. Tecno has included a RAM chip of 1GB in size which should give just enough computing memory for installing and running a large variety of software. Internal storage although standard at 16GB can be increased by tapping into the micro SD card slot. You can still subscribe to cloud storage on this 3G device.
Having a large body makes it easier for engineers to equip smartphones with capacious batteries, and in this case, a 3, 000 mAh non- removable Li-Ion battery has been included.
                                     

TECNO CAMON C5 REVIEW PLUS HOW TO FLASH STOCK ROM FREE

Tecno-Camon-C5-Best-Price-in-Kenya
The TECNO Camon C5 is one of the most popular smartphones in Kenya right now (August 2015).
It is common for buyers to be super excited about TECNO Mobile’s new offerings since the vendor holds a significant chunk of the Kenyan budget smartphone market.
The Camon C5 leaked a couple of weeksbefore it launched and this inflated our expectations about the smartphone. Unfortunately, some of that leaked info about the specifications of the smartphone was rather inaccurate.
The TECNO Camon C5 is, however, here and this is what the smartphone has to offer.
Technical Specifications
Display
Display Size: 5.0 inches
Display Type: IPS LCD capacitive
Screen Resolution: 720 x 1280 pixels
Screen Resolution Density: 294 ppi
Screen Protection: None
The TECNO Camon C5 features a 5-inch 720p HD LCD display. There is nothing fancy about this since the display profile is exactly what you get on its older sibling, the Boom J7.
A 1080p Full HD display would have been awesome, but I guess that was not an option since the Camon C5 is a budget smartphone.
Design
Frame Dimensions: 137.5 x 69.3x 8.6 mm
Color: Midnight Black, Dark Blue, Amber Gold, Oyster White

The TECNO Camon C5 features a generic candy bar design and nothing in particular makes the smartphone to stand out from the crowd.
I say this from the perspective of the Boom J7, which is by all standards a gorgeous smartphone. What could maybe raise your attention is the LED Flash that is strategically placed besides the front facing camera.
The idea of a front-facing LED flash is still rather new but the concept has been catching up and recently made a debut on a Samsung smartphone through the Galaxy J5 and Galaxy J7, two awesome smartphones that are now available in Kenya.
Performance
Operating System: Android 5.0 Lollipop
CPU: 1.3GHz Quad-core
RAM: 1 GB
Internal Memory: 8 GB
Micro SD: Yes, up to 128 GB
The TECNO Camon C5 boasts of a 1.3GHz Quad-core CPU and 1 GB RAM. This is again exactly what you find on the Boom J7.
What is, however, the distinguishing feature of the Camon C5 is that it runs Android 5.0 Lollipop out of the box. The TECNO Camon C5 is the first smartphone to run the latest available version of the Android Operating system and this is kind of a big deal.
Also, the smartphone is 4G enabled, meaning that it can access the super-fast 4G connectivity . The TECNO Camon C5 is now among the cheapest 4G smartphones
Apart from that you get some 8 GB for your files, as well as a Micro SD slot that can take in up to 128 GB of Micro SD memory.
Camera
Rear Camera: 8 MP
Secondary Camera: 2 MP
LED Flash: Yes (Front and Back)
The camera TECNO Camon C5 camera profile is the highlight feature of the device. Personally, I thought it was all about the 4G connectivity, but a source inside TECNO Kenya emailed me and even forwarded some of the images captured by the device.
The TECNO Camon C5 features an 8 MP Rear Snapper and a 2 MP front facing selfies. Both the two cameras come with an LED flash, a first from TECNO.
It was at first hard to understand how at this age, you could market an 8MP smartphone as a camera phone. However, once i delved into the details (you should too) and learned more about its camera hardware that I realized that TECNO has the creds to justify the sophistication of the Camon C5 camera.
Check out a couple of TECNO Camon C5 sample images.
Battery and Extras
Battery Capacity: Li-Ion 2500mAh
The TECNO Camon C5 is a 4G Smartphone and this means that it should have a powerful battery with a stamina to keep the lights on for long.
Its Li-Ion 2500mAh battery doesn’t disappoint.
Extras
4G Connectivity
Verdict
TECNO probably used some of the residual components of the Boom J7 on the Camon C5. The Camon C5 is basically the Boom J7 with a few but very important refinements here and there.
The refinements include that the Camon C5 run Android 5.0 Lollipop, has a refined camera and is 4G ready. The 4G part to me is the most attractive part of the entire package.
I am of the opinion that those who care very much about high quality digital photography are less likely to rely on a TECNO smartphone to provide that.

Why you should buy the TECNO Camon C5
Powerful CPU
Android 5.0 Lollipop
4G Ready
Awesome Camera Profile
Cons of the TECNO Camon C5
Plain Design
                                           

Monday, January 19, 2015

HOW TO FLASH ROM OR APP ON ANY ANDROID FROM RECOVERY


Instaling A ROM Or App From Zip File To Android Device From Recovery


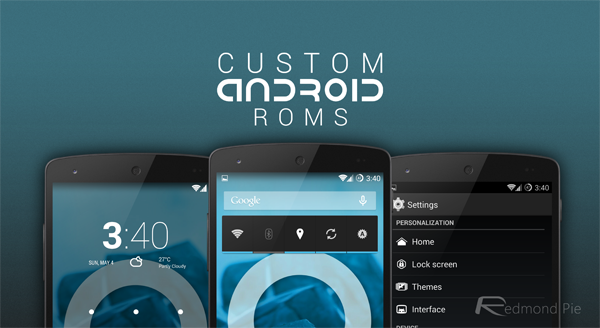
We have been covering a lot of Android ROMs and applications here at AddictiveTips and the installation procedure of most of those ROMs is the same. That’s why we decided to write a dedicated guide on how to flash any ROM or app from a zip file to your Android device using recovery. In this guide, we will be covering the entire flashing procedure, along with links to resources for rooting your device and making and restoring backups.
Please note that the terms ‘installing’ and ‘flashing’ can be used interchangeably here and will mean the same thing.
AndroidOfficial ROM updates from device manufacturers or carriers are released in conveniently packaged installation files that you can run on your computer while your Android device is connected to it, and they automatically take care of updating your phone’s system. Similarly, most applications are available directly in the Android Market for easy installation, or come packaged as convenient ‘.apk’ files that you can just run on your Android phone to install. The case is not the same with most custom ROMs and several custom applications, which come in .zip files rather than PC installers or .apk files.
The idea of installing a customized operating system to their smartphone can be quite intimidating for inexperienced users. Though once they get used to it, some of them end up trying out different ROMs for their devices several times a day. While we don’t exactly recommend that you flash every new ROM that is made available for your Android phone, we are here to help you get over the fear of flashing a ROM that enhances the capabilities of your device so that you can use it to its fullest potential.
Here is a quick look at what we will be covering in this guide. Feel free to skip to the real deal if you already meet the prerequisites.
There are certain steps that you might not require, and we shall be mentioning them in each section.
Before We Begin: Battery Check

Before you proceed with any of the following steps, make sure your phone’s battery level is not too low. It is recommended to have it at 50% or more. Do NOT take this lightly. If your phone’s battery runs out while you are attempting to flash a custom ROM, there is a significant chance of your phone getting bricked and becoming unusable PERMANENTLY.
Before We Begin: Unlocking the Bootloader (Stock Android Devices Only)
Note: This step applies only to Android devices with stock version of Android installed. At the moment, Google Nexus One and Nexus S are the only two such devices available. You may skip this step if you are using any other Android device.
Users of stock Android devices such as the Google Nexus One or Nexus S also need to unlock its bootloader before they can proceed. To do this, simply follow this guide on what is the bootloader and how to unlock it for stock Android phones. Once you have done this, you may proceed to the next step.


Before We Begin: Rooting


Note: You may skip this step if your device is already rooted, or if you already know how to root it.
Before you can install a custom ROM to your device, your phone needs to be rooted.  Rooting is basically administrator or root level access required to perform administrative tasks on your Android device. To root your phone, you can refer to this detailed guide on how to root an Android device. Once you are done with the rooting process, you may proceed to the next step.
Before We Proceed: Installing A Custom Recovery

Note: You may skip this step if you already have a custom recovery installed on your device.
Rooting grants you the necessary access level to execute administrative tasks on your Android device but it is the recovery that provides the tools necessary to actually perform those tasks. While every Android device ships with a recovery, the stock recovery is quite limited in what it lets you do, and you need a custom recovery image to perform advanced operations on your device. We have covered this process in detail in this guide on how to install a custom recovery to a rooted Android device that you can follow. Once you have a custom recovery installed on your phone, you will be ready to proceed to the next step.
The Real Deal: Installing a Custom ROM to your Phone

Now that you have a custom recovery installed on your phone, you can perform all sorts of wonderful advanced operations on your device and this includes the ability to flash a ROM or application from a zip file. The procedure is pretty standard for most ROMs, though there are certain ROMs which require additional steps for their installation. Since those steps differ from ROM to ROM, we shall be mentioning those in our reviews and guides on those ROMs, and feature only the standard instructions here.
There are two paths to follow from here. You can either use ROM Manager to specify the actions you need performed in Recovery, and it will take care of everything for you, or you may manually reboot your phone into recovery to perform the steps yourself. We will cover both methods here. If you used the ROM Manager method to flash ClockworkMod recovery, you already have it installed. If you used some other method to flash the recovery, or flashed a recovery other than ClockworkMod, you might not have ROM Manager installed but you can get it for free by searching for it at the Android Market.

  • Using ROM Manager

  1. Download the ROM from the link given in the article featuring that ROM. It should be a zip file.
  2. Connect your phone to your computer via USB and mount its storage card.
  3. Copy the downloaded ROM to the storage card. It is a good idea to place it on the root of the storage card.
  4. Launch ROM Manager on your phone.
  5. Tap ‘Install ROM from SD Card’
  6. Scroll down and tap on the zip file for the ROM that you copied to your sd card in step 3. You will be presented with a dialog box titled ‘Install Queue’.
  7. In case you want to install another zip file immediately after this ROM, tap ‘Add zip’ and select the next zip file that you want flashed. Skip this step if the ROM is all you want to flash for now.
  8. Tap ‘OK’. You will now see a dialog titled ‘ROM Pre-Installation’, with options to backup the existing ROM and wipe data and cache.
  9. ALWAYS check ‘Backup Existing ROM’ UNLESS you can afford to lose everything that’s on your phone at the moment.
  10. ALWAYS check ‘Wipe Data and Cache’, UNLESS the ROM you are attempting to flash is an updated version of the same ROM that you are currently using, and is compatible with the previous installation’s data. It is usually mentioned with the update whether you can install it over a previous version without wiping its data or not.
  11. Tap ‘OK’ and confirm any prompt that you get. Your device will now reboot into recovery and the selected ROM will be automatically installed. The new ROM will be booted once the installation is complete, though you might be prompted to confirm the reboot.

  • Manually

  1. Download the ROM from the link given in the article featuring that ROM. It should be a zip file.
  2. Connect your phone to your computer via USB and mount its storage card.
  3. Copy the downloaded ROM to the root of the storage card.
  4. Power your phone off and reboot it into recovery. This will involve using a combination of your device’s hardware keys. In case you don’t know how to do this, you can follow this guide on how to boot your phone into recovery. Once in recovery, you can navigate its menu using the volume up and volume down hardware keys or your phone’s trackball / optical track pad if it comes equipped with one.
  5. Use the ‘backup and restore’ feature of recovery to backup your existing ROM installation, software and data. This step is known as performing a nandroid backup. For more information on how to make and restore backups, see this guide on how to perform and restore a nandroid backup. ALWAYS perform a backup before flashing a custom ROM, UNLESS you can afford to lose everything that’s on your phone at the moment. Note: ALWAYS choose to perform the following steps 6, 7 and 8 UNLESS the ROM you are attempting to flash is an updated version of the same ROM that you are currently using, and is compatible with the current installation’s data. It is usually mentioned with the update whether you can install it over a previous version without wiping its data or not.
  6. Get back to the main recovery menu and use the option ‘wipe data/factory reset’. You will be prompted to confirm this action. Select “Yes – Delete all user data”.
  7. From the main recovery menu, select ‘wipe cache partition’. You will be prompted to confirm this action. Select ‘Yes – Wipe Cache’.
  8. From the main recovery menu, enter the ‘advanced’ menu. From this menu, select ‘Wipe Dalvik Cache’. You will be prompted to confirm this action. Select ‘Yes – Wipe Dalvik Cache’.
  9. Go back to the main recovery menu by pressing the back button and select the ‘Install zip from SD card’ option.
  10. Select ‘choose zip from sdcard’ to get a list of the files and folders on your SD card. Scroll to the ROM’s file that you copied there in step 3, and select it. You will be prompted to confirm this action. Select ‘Yes – Install file_name.zip’ where file_name.zip is the name of the zip file that you are trying to install.
  11. Wait patiently while the ROM is flashed to your phone via recovery.
  12. Once the installation is complete, head back to the main recovery menu if you aren’t there, and select ‘reboot system now’. Your phone will now boot into the newly installed ROM.
The Real Deal: Installing an App From a Zip File to your Phone
While most apps for Android devices are available at the app store for direct download and installation or as .apk files for direct installation, there are certain apps which are only available as zip files installable from recovery. Their installation procedure is the same as installing a custom ROM that we just featured above. However, there are a few minute differences.

  • When installing an app from a zip file, you do NOT need to perform the ‘wipe data/factory reset’ step so NEVER do that unless you know what you are doing, have a complete backup and want to start using your ROM as a fresh installation with the new app added.
  • You might or might not need to wipe the cache and the dalvik cache for installing apps from zip file. This varies from app to app and the developers of such apps as well as many reviewers including us mention when featuring an app whether it requires a cache and dalvik cache wipe or not. However, it never hurts to wipe these caches anyway, and it does not effect the data on your device or its storage card.
There you go, this concludes our guide on how to flash a ROM or app from a zip file to your Android device using a custom recovery. To try out the skills that you just learned, search our site for custom ROMs for your phone and start flashing, always remembering to take backups first!

Saturday, January 17, 2015

ALL ANDROID SHORTCODES THAT EXIST

Hello world, Its been all over 6 months now but dont worry, I have some good news for ya'll. I have been collecting a comprehensive supply of android short hack codes and I have exhausted the list as of now. I would love to share it with all of you fans and I am sure it will be helping someone out there to do something amazing or help someone. 
Otherwise I know you will have some kindah use for it, So here goes


*.*#*#778O#*#* = Factory Data Reset
*.*#*#I472365#*#* = Starts a Quick GPS Test
*.*#*#0673#*#* OR *#*#0289#*#* = Starts Audio Test
*.*#*#2664#*#* = Starts Touch Screen Test
*.#’#273283*255*663282*#*#* = Backup Media Files
*.*#*#0283#*#* = Starts Packet LoopbackTest
*.*2767*3855# = Reinstalls The Phones Firmware & Format Your Phone
*.*#*#232339#*#* OR *#*#526#*#* = Starts Wireless LAN Test
*.*#*# 1575#*#* = Starts Different GPS Tests
*.*#*#4636#*#*‘ = Shows Complete Information About Your Phone
*.*#*#2663#*#* = Shows Touch Screen Version
*.*#*#232337#*# = Displays Bluetooth Device Address
*.*#*#4986*2650468#*#* = Shows PDA, Phone Hardware, RF& Call Date
*.*#*#44336#*#* = Displays Build Time
*.*#06# = Displays IMEI Number
*.*#*#8255#*#* = Google Talk Service Monitoring
*.*#*#I II I#*#* | *‘#*#2222#*#* = Shows FTA Software Version & FTA Hardware Version
*.*#*#3264#*#* = Shows ROMVersion
*.*#*#23233I#‘*#* = Starts Bluetooth Test
*.*#*# 1234#’#’ = Shows PDA & Phone Firmware Information
*.*#*#0*#*#*= Starts LCD Display Test
*.*#*#0842#*#* Starts Vibration & Backlight Test
*.*#*#0588#*#* = Shows Proximity Sensor Test
*.*#*#232338#*#* = Shows Wi-Fi Mac Address
*.*#*#7262626#*#*= Shows Field Test
*.*#*#34971539#*#* = Shows Camera Update
*.*#*#19732840#*#* = Enables Test Mode
*.*#06# – Shows IMEI number
*.*#0*# – Shows Service Menu (Galaxy S III + )
*.*#*#4636#*#* – Shows Phone Information,Usage Statistics & Battery Information
*.*#*#34971539#*#* – Shows Detailed Camera Information
*.*#*#273282*255*663282*#*#* – Immediate Backup of AllMedia Files
*.*#*#197328640#*#* – EnablesTest Mode For Service
*.*#*#232339#*#* – Wireless LAN Tests
*.*#*#0842#*#* – Backlight & Vibration Test
*.*#*#2664#*#* – Touch Screen Test
*.*#*#1111#*#* – FTA Software Version (if 1111 does not work try 1234)*.*#12580*369# – Software &Hardware Information*.*#9090# – Diagnostic Configuration
*.*#872564# – USB Logging Control
*.*#9900# – System Dump Mode
*.*#301279# – HSDPA/HSUPA Control Menu
*.*#7465625# – ViewsPhone Lock Status
*.*#*#7780#*#* – Resets The Data Partition To Factory State
*.*2767*3855# – FormatsDevice to FactoryState (will delete everything on phone)
*.##7764726 – Hidden Service Menu (forsome Motorola Droid series)*.*#*#7594#*#* – EnablesDirect PoweringDown of Device (once this code is entered)
*.*#*#273283*255*663282*#*#* –Quick Backup of All The Media Files On Your Android Device
*.*#*#232338#*#* – Shows Wi-Fi MAC Address
*.*#*#1472365#*#* – Performs a Quick GPS Test
*.*#*#1575#*#* – For a More Advanced GPS Test
*.*#*#0283#*#* – Performs a Packet Loopback Test
*.*#*#0*#*#* – Runs a LCD Display Test
*.*#*#0289#*#* – Runsan Audio Test
*.*#*#2663#*#* – ShowsDevice’s Touch Screen Version
*.*#*#0588#*#* – Performs a Proximity Sensor Test
*.*#*#3264#*#* – Shows RAM Version
*.*#*#232331#*#* – Runs Bluetooth Test
*.*#*#232337#*# – Shows device’s Bluetooth Address
*.*#*#7262626#*#* – Performs a Field Test
*.*#*#8255#*#* – Monitors Google Talk Service
*.*#*#4986*2650468#*#* – Shows Phone,Hardware, PDA, RF Call Date & Firmware Information
*.*#*#1234#*#* – Shows PDA & Phone Firmware Information
*.*#*#2222#*#* – Shows FTA Hardware Version
*.*#*#44336#*#* – Shows Build Time&Change List Number
*.*#*#8351#*#* – Enables Voice Dialing Log Mode
*.*#*#8350#*#* – Disables Voice Dialing Log Mode
*.##778 (+call) – Shows EPST Menu
*.*#*#7594#*#* – EnablesDirect PoweringDown of device once this code is entered
*.*#*#232338#*#* – Shows Wi-Fi MAC Address

Specific Codes for HTC devices:-


*.*#*#3424#*#* – Runs HTC Function TestProgram
*.##786# – Reverse Logistics Support
*.##3282# – Shows EPST Menu
*.##3424# – RunsDiagnostic Mode
*.*#*#8255#*#* – Launches Google Talk Service Monitor
*.##33284# – PerformsField Test
*.##8626337# – Runs VOCODER
*.*#*#4636#*#* – Shows HTC 

Tuesday, October 7, 2014

HOW TO REMOVE OR RESET ALL WINDOWS PASSWORD

HOW TO REMOVE OR RESET ALL WINDOWS PASSWORDS YOU ASK?? 

Well many of us if not all of us have at one time or another had to face with the really frustrating option of either loosing the admin password or just being on a cmputer where the admin has locked everything with a password and yes that really sucks. 


but now come to think of it if we knew where windows stores its passwords then it would be easy to bypass the password request for loging in to admin whether on a personal computer or on a school,work etc. computer. good thing is we know and so a very genius company called HIREN  CAME UP WITH A BOOTABLE CD that can help you do just that...delete the password file and leave the admin open or iven change it if its on your own computer. i will guide you on a step by step course of how we do that.
you might need
1. RUFUS BOOTABLE FLASH DRIVE MAKER FROM HERE


you definitely need:
1. HIRENS BOOT CD[IMAGE FROM HERE]


Use the rufus software to make a bootable flash drive of the  hirens image if you will not be using it on burned iso disk
Tested on: NT 3.51, NT 4 (all versions and SPs), Windows 2000 (all versions & SPs), Windows XP (all versions, also SP2 and SP3), Windows Server 2003 (all SPs), Windows Vista 32 and 64 bit (SP1 also), Window 7 (all variants). Some also say that it works on Windows Server 2008 too.
If used on users that have EFS encrypted files, and the system is XP or Vista, all encrypted files for that user will be UNREADABLE! and cannot be recovered unless you remember the old password again. If you don't know if you have encrypted files or not, you most likely don't have them (except maybe on corporate systems).

Boot your computer with Hiren's BootCD and follow the steps below for resetting your password:

1. Enter "Offline NT/2000/XP/Vista/7 Password Changer"

With Up & Down keys select Offline 'NT/2000/XP/Vista/7 Password Changer' and press Enter.

2. Wait for "Offline NT Password & Registry Editor" to Load

On the screen below, you'll see is several lines of text that quickly run down the screen. You don't need to do anything here. Wait for "Offline NT Password & Registry Editor" to load.


1. Select "NT/2000/XP/Vista/7 Password Changer"


2. Linux files are loading...

3. Choose the Correct Hard Drive Partition

This step in the Offline NT Password & Registry Editor process is to select the partition that contains the Windows installation that you want to delete a password from.
Many computers have a single operating system installed on a single partition on a single hard drive, making this a very easy choice.
If that's the case for you, just press ENTER to accept the default partition. Otherwise, type the number corresponding to the correct partition from the Candidate Windows partitions found list and then press ENTER.

If more than one partition is listed and you're not sure which one to pick, chances are the larger partition is the one with Windows installed.

Every Windows 7 PC will have more than one partition listed.

4. Confirm the Windows Registry Path

Offline NT Password & Registry Editor now needs to know the exact location of the Windows Registry. Except in the rarest of occasions, the default location will be the correct one.
Just Press ENTER to accept the default Windows Registry path without writing anything else.


3. Choose the Correct Hard Drive Partition


4. Confirm the Windows Registry Path

5. Choose the Password Reset Option

Offline NT Password & Registry Editor is now asking which part of the registry it should load.
Press ENTER to accept the default choice of Password reset.

The Offline NT Password & Registry Editor tool can perform various functions aside from resetting passwords but since that's the focus of this particular walkthrough, that's all we'll discuss.

6. Choose the Edit User Data and Passwords Option

Now that the registry is loaded and available to the program, Offline NT Password & Registry Editor needs to know exactly what you want to do.
Press ENTER to accept the default choice of Edit user data and passwords.
This will load the necessary options for the actual password reset.


5. Choose the Password Reset Option


6. Choose the Edit User Data and Passwords Option

7. Enter the Username to Edit

Offline NT Password & Registry Editor now needs to know which user's password you'd like to delete (erase, clear, blank, remove, call it what you like).
A default user is listed between the brackets at the prompt. In the above example, you can see that it's the Administrator user.
If the default user is the user you'd like to remove the password from, simply press ENTER. Otherwise, enter the username and then press ENTER.

8. Type 1 to Clear (blank) user password and then press ENTER

At the bottom of the screen you'll see the User Edit Menu with several options to choose from.
Type 1 for Clear (blank) user password and then press ENTER.

Offline NT Password & Registry Editor shows some interesting information about the username you entered in the last step - the full name, what groups the user belongs to, how many failed login attempts have taken place, how many total logins have been completed, and more.

If you see a check in the "Passwd not req." box, this means that a password is not a requirement for this particular user. It does not mean that a password is not required to access the account in Windows. In other words, it's saying that it is possible to erase this user's password.


7. Enter the Username to Edit


8. Type 1 to Clear (blank) user password and then press ENTER

9. Type ! to quit the User Edit Tool

Assuming there weren't any problems, you should see a Password cleared! message after entering 1 in the previous step.
Type ! to quit editing user and then press ENTER.

You must confirm these changes in a later step before they are actually complete. If you quit Offline NT Password & Registry Editor now then the password reset will not take place!

10. Type q to Quit Offline NT Password & Registry Editor

Enter q and then press ENTER to quit the Offline NT Password & Registry Editor registry editing tool.
Important: You're still not done! You need to confirm your password reset change in the next step before it will take effect.


9. Type ! to quit the User Edit Tool


10. Type q to Quit Offline NT Password & Registry Editor

11. Type y and then press ENTER to confirm Password Reset Changes

At the Step FOUR: Writing back changes menu, Offline NT Password & Registry Editor asks if you want to write file(s) back.
Type y and then press ENTER.
You should see an EDIT COMPLETE message appear on screen. If you do, it means that Offline NT Password & Registry Editor has written the password changes to your computer!

12. Confirm That You're Finished Using Offline NT Password & Registry Editor

Offline NT Password & Registry Editor gives you an option here to rerun the program. If you've been following along with this guide and everything seems to have worked properly then there's little reason to repeat anything.
Press ENTER to confirm the default option of not rerunning the password reset.


11. Type y and then press ENTER to confirm Password Reset Changes


12. Press ENTER to Confirm That You're Finished Using Offline NT Password & Registry Editor

13. Remove Hiren's BootCD and Restart the Computer

That's it! You've just completed the entire Offline NT Password & Registry Editor password removal process.


13. Remove Hiren's BootCD and Restart the Computer


Note: If you receive a "job control turned off" or a "can't access tty" error, don't worry. As long as the EDIT COMPLETE confirmation message was posted to the screen after you confirmed the password reset changes then your password was successfully reset. You should still be able to see the confirmation on the screen at this point.
Remove Hiren's BootCD from your CD/DVD drive and then manually reset your computer.
In the next step, you'll finally get to logon to Windows without entering a password!
Now that your password has been removed using Offline NT Password & Registry Editor, no password is required to log on to Windows.
If you are the only user on your computer, Windows will boot all the way to the desktop on the next reboot and will skip the logon screen altogether.
If you're on a multi-user computer (as many families are), the logon screen will still appear after starting Windows but when you click on the user that had the password removed, you will not be prompted for a password and will instead enter Windows automatically.
Having a secure password is important so please don't continue to use Windows without one. As soon as you've gained access to your computer again, configure a new password - one you can remember a little easier!